 |
| How To Partition an External Hard Disk |
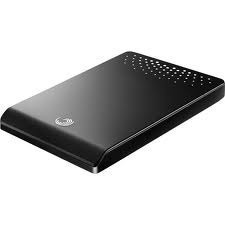
An external hard drive is a portable storage device that is similar to an internal hard drive, but sits on the outside of a computer rather than the inside. It connects to a computer via a USB port on the external casing of the computer and may or may not require its own power source. External hard drives are often preferred over internal hard drives because they are more portable, able to store large amounts of data, and can connect to a computer via Plug-and-Play technology, allowing users to easily access their files from any computer they connect their external hard drive to.
Applications
An individual may use an external hard drive to store more data than an internal hard drive is capable of storing. Likewise, an individual may use an external hard drive when travelling in order to access programs, documents, games, pictures, videos, music, and other media from any computer that has a USB port. Business owners may also use external hard drives while travelling in order to share important files with colleagues, customers, and investors. An external hard drive can also be used as a server for a website or web hosting service when connected to the Internet, due to their capacity to store large amounts of information.
What is a Partition?
A partition is a technique used in computer science to differentiate between multiple sectors of the same hard drive. By partitioning a device, a user can setup different settings, applications, and entire operating systems on each partition. For example, when a user installs an operating system on a home computer, the computer allows the user to setup individual partitions and designate how much disk space is dedicated to each partition. In theory, the user can install a separate operating system on each partition and switch back and forth between those partitions for different tasks. The most common reason for setting up multiple partitions is to have one partition for high quality applications such as gaming or watching videos and another partition for daily use, such as word processing, email, and Internet access. Separating these applications with individual partitions can improve performance and minimize the demand on the computer’s CPU.
How to Partition an External Hard Drive
1) Click on the Start Menu, right-click on My Computer, and select “Manage.” This will display the Computer Management window and will display System Tools and Storage options on the left-hand side.
2) Click the Disk Management option under Storage, right-click the external hard drive’s volume letter, and click “Shrink Volume.” The Shrink Volume window will be displayed and will allow the user to modify how much disk space is dedicated to that volume. By decreasing the volume’s size, the user will create an unallocated partition, which is a partition that has not been formatted or given a volume letter.
3) Right click on the unallocated partition, select “New Simple Volume,” and complete the following options that are given. The external hard drive is now partitioned.
For Further Reading,

0 comments:
Post a Comment
Your comments Will Be now Do-follow.
Comment Here.